尝试一下 Open in CodePen 在线预览 此示例演示如何使用格网 几何创建冬季低面景观。低面地图由粗糙的三角化地形和由相对较少的面组成的 3D 模型组成,也称为低面模型。这些地图描绘了有趣,抽象的世界观,用于旅游或营销目的。此外,它们还可用于创建幻想地图或用于以有趣方式教授地理的教育游戏。
此示例中的低面地形是使用 meshUtils.createFromElevation() 方法从 ElevationLayer 创建的格网几何。
1
2
3
4
5
6
7
8
9
10
11
const elevationLayer = new ElevationLayer({
url : "//elevation3d.arcgis.com/arcgis/rest/services/WorldElevation3D/Terrain3D/ImageServer"
});
meshUtils
.createFromElevation(elevationLayer, extent, {
demResolution : 120
})
.then( ( mesh ) => {
// mesh now contains a representation of the terrain
// as a Mesh geometry
});
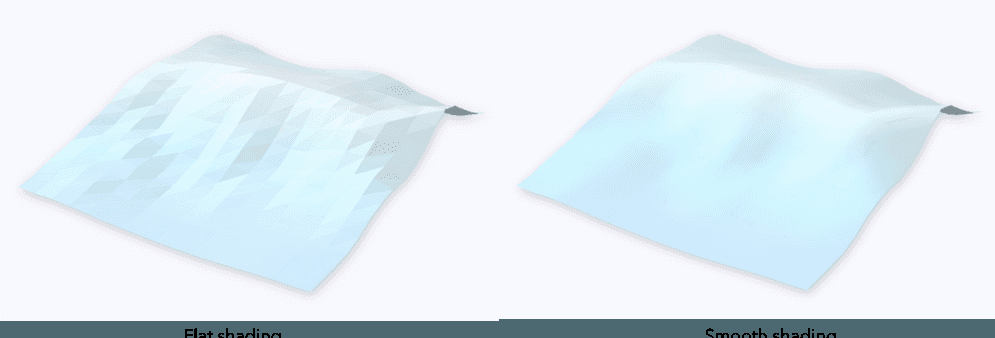
这将使用实际高程值创建具有 smooth 阴影的格网。为了创建低面效果,MeshComponent.shading 被更改为 flat:
1
mesh.components[ 0 ].shading = "flat" ;
接下来,我们将根据折点的高程将颜色应用于每个折点。其中,vertexAttributes 属性存储有关折点颜色的信息。此信息存储为红色、绿色、蓝色和 Alpha 分量的平面数组。
1
2
3
4
5
6
7
8
9
10
11
12
const vPositions = mesh.vertexAttributes.position;
// Every third element in the positions array represents the height value
// [x1, y1, z1, x2, y2, z2, ...]
for ( let index = 0 ; index < vPositions.length; index += 3 ) {
// getColorFromHeight returns an object of type Color with
// color information interpolated from a given height based color ramp
const color = getColorFromHeight(vPositions[index + 2 ]);
vColors.push(color.r, color.g, color.b, 255 );
}
mesh.vertexAttributes.color = vColors;
MeshComponent 上设置了 MeshMaterialMetallicRoughness 类型的材质,以模拟雪反射光线的效果。这种材料的金属 和粗糙度 属性用于控制材料反射回来的光的数量。在示例中,打开和关闭“灯光反射效果”,以注意地形格网在使用和不使用该材质时的显示方式。
1
2
3
4
mesh.components[ 0 ].material = new MeshMaterialMetallicRoughness({
metallic : 0.3 ,
roughness : 0.8
});
通过创建图形并将图形添加到 GraphicsLayer,可以将格网添加到场景中:
1
2
3
4
5
6
7
8
9
10
11
12
13
const graphic = new Graphic({
geometry : mesh,
symbol : {
type : "mesh-3d" ,
symbolLayers : [
{
type : "fill"
}
]
}
});
terrainSurfaceLayer.add(graphic);
默认情况下,颜色折点将乘以在 MeshSymbol3D 上设置的颜色值。在此示例中,要显示分配给折点的颜色,未在 MeshSymbol3D 上设置颜色。
GLTF 格式 的自定义3D模型(如树木)可以作为点符号放置在场景中 ObjectSymbol3DLayer 中。要将它们与格网表面对齐,请使用格网 几何上的 elevationSampler 同步查询每个树位置的高度值。
1
2
3
4
5
6
7
8
9
10
11
12
meshUtils.createElevationSampler(mesh)
.then( ( elevationSampler ) => {
const geometry = new Point({
x : 948679.688 ,
y : 5991891.073 ,
spatialReference : SpatialReference.WebMercator
});
// Query elevation of the mesh at tree location
const geometry3D = elevationSampler.queryElevation(geometry);
// geometry3D has z-values based on the mesh elevation
});
此 3D 松树模型 从 Google Poly 下载,并在 CC-BY 3.0 许可 下使用。
1
2
3
4
5
6
7
8
9
10
11
12
13
14
const treeSymbol = {
type : "point-3d" ,
symbolLayers : [
{
type : "object" ,
resource : {
href :
"./pine_tree.glb"
},
height : 100 ,
anchor : "bottom"
}
]
};
此外,还可以从面 创建格网 。为了在此示例中生成湖,请从 aFeatureLayer 查询湖的面几何。方法 Mesh.createFromPolygon() 将湖泊要素的面 几何转换为格网 几何。
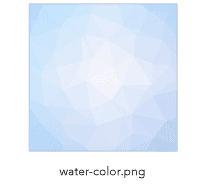
这允许使用 colorTexture 在其上应用三角形图案:
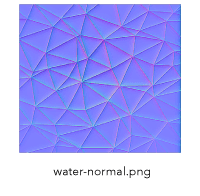
为了使三角形突出,我们还将应用从三角形边界生成的法线地图。在本例中,此纹理是在 Adobe Photoshop 中使用 过滤器 -> 3D ->生成法线地图 生成的。
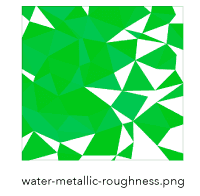
metallicRoughnessTexture 对每个三角形应用不同的粗糙度和金属值,以反射不同数量的光。金属参数编码在蓝色通道中,粗糙度编码在绿色通道中。
1
2
3
4
5
6
7
8
9
10
11
12
13
14
15
16
17
18
19
20
21
22
23
24
25
26
27
28
29
30
31
32
33
const mesh = Mesh.createFromPolygon(lakePolygon);
// Set uv coordinates that are used to map the texture on the geometry
mesh.vertexAttributes.uv = getUVCoordinates(mesh);
mesh.components[ 0 ].material = new MeshMaterialMetallicRoughness({
colorTexture : "./water-color.png" ,
normalTexture : "./water-normal.png" ,
metallicRoughnessTexture : "./water-metallic-roughness.png"
});
// Normalize mesh vertex positions to use them
// as UV coordinates for the texture mapping
function getUVCoordinates ( mesh ) {
const uv = [];
const xmin = mesh.extent.xmin;
const xmax = mesh.extent.xmax;
const ymin = mesh.extent.ymin;
const ymax = mesh.extent.ymax;
const position = mesh.vertexAttributes.position;
for ( let i = 0 ; i < position.length; i+= 3 ) {
const x = position[i];
const y = position[i + 1 ];
const u = (x - xmin) / (xmax - xmin);
const v = (y - ymin) / (ymax - ymin);
uv.push(u);
uv.push(v);
}
return uv;
}


