尝试一下 在 CodePen 中打开 在线预览 重点注意:
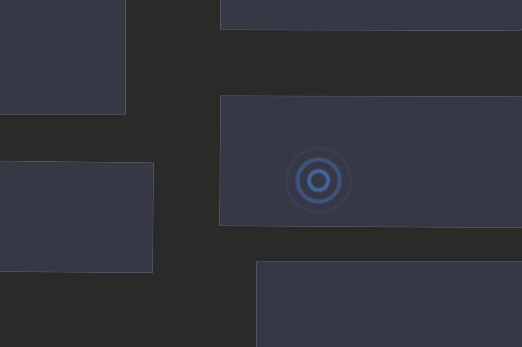
此示例显示实验功能,请在产品中使用之前仔细阅读文档。 此示例面向熟悉 WebGL 和硬件加速渲染的专家开发人员。 此示例演示如何将自定义 WebGL 对象添加到地图。我们将创建一个受电信图标启发的脉动标记。它是一个动画图标,人们通常将其与无线电发射器和广播联系起来。
开发人员可以通过创建自定义图层并覆盖负责在屏幕上绘制的方法,将自己的 WebGL 渲染算法插入 MapView 。至少用户应该继承 Layer 或其他一些合适的基础层,以及 BaseLayerViewGL2D 。
请注意,此示例并非旨在成为点图形的通用可视化技术;为此,它需要尊重 Graphics.symbol 属性,至少在它被设置为 SimpleMarkerSymbol 实例的情况下。
从可视化的角度来看,这意味着至少要尊重 SimpleMarkerSymbol.type 属性,以支持非圆形标记,以及其他可能影响屏幕上标记位置的属性,例如 size、 angle、 offsetx 和 offsety 。
第一步是对合适的图层类型进行子类化。在我们的例子中,我们继承了 GraphicsLayer 以利用它的图形 集合,我们将把它用作可视化的数据源。我们真正需要做的唯一事情是重写 createLayerView() 以实例化自定义 WebGL 层视图。请注意,此工作流仅支持 MapView 中的可视化。
1
2
3
4
5
6
7
8
9
10
11
12
const CustomLayer = GraphicsLayer.createSubclass({
createLayerView : function ( view ) {
// We only support MapView, so we only need to return a
// custom layer view for the `2d` case.
if (view.type === "2d" ) {
return new CustomLayerView2D({
view : view,
layer : this
});
}
}
});
任何层都可以用作基类。在某些情况下,需求将需要最通用的选项,即抽象层 ,它是 API 附带的所有具体层类型的基类。在这种情况下,派生的自定义层可能需要定义自定义数据访问功能。
重点
为了使图层类型与混合模式 和图层效果 一起使用,它必须定义两个名为 blendMode 和 effect的属性。GeoScene API for JavaScript 附带的所有图层类型都具有此类属性,因此具有对混合模式和图层效果的内置支持。
如果需要支持混合模式和图层效果,自定义图层需要明确定义这些属性。
1
2
3
4
5
6
const CustomLayer = Layer.createSubclass({
properties : {
blendMode : {},
effect : {}
}
});
BaseLayerViewGL2D我们还需要继承 BaseLayerViewGL2D。首先定义两个静态属性 aPosition 和 aOffset,我们将它们初始化为 0 和 1。这些将用于调用 gl.bindAttribLocation、gl.enableVertexAttribArray 和 gl.vertexAttribPointer。
1
2
3
4
5
6
// Subclass the custom layer view from BaseLayerViewGL2D.
const CustomLayerView2D = BaseLayerViewGL2D.createSubclass({
// Locations of the two vertex attributes that we use. They
// will be bound to the shader program before linking.
aPosition : 0 ,
aOffset : 1 ,
此类的构造函数将负责初始化实例属性并在 layer.graphics 属性上设置观察者。
然后我们将继续覆盖 attach() 、 detach() 和 render() 。 我们将在 attach() 中创建渲染所需的所有 WebGL 资源,例如着色器程序和缓冲区,在 render() 中使用它们,最后在 detach() 中删除它们 。我们还将展示如何覆盖 hitTest() 以便用户能够与自定义视图显示的功能进行交互。
1
2
3
4
5
6
7
8
9
10
11
12
13
14
15
16
17
18
19
// Called once a custom layer is added to the map.layers collection and this layer view is instantiated.
attach : function ( ) {
...
},
// Called every time a frame is rendered.
render : function ( renderParameters ) {
...
},
// Called once a custom layer is removed from the map.layers collection and this layer view is destroyed.
detach : function ( ) {
...
},
// Called by the map view or the popup view when hit testing is required.
hitTest : function ( mapPoint, screenPoint ) {
...
},
我们将看到 render() 有时会检测到需要完全覆盖所有顶点和索引数据的条件。由于这是一个相当复杂的操作,我们将其分解为一个名为 updatePositions() 的实用方法。
1
2
3
4
5
// Called internally from render().
updatePositions : function ( renderParameters ) {
...
}
});
在构造函数中,我们设置了一些矩阵和向量,顶点着色器将使用这些矩阵和向量在屏幕上定位几何图形。我们使用 glMatrix 库来简化这个过程。
基本上涉及两个矩阵:transform 和 display。
transform 将地图单位(即米 )转换为像素;display 从像素转换为剪裁空间 。最终只有这些矩阵被传递给着色器,但我们使用更多的辅助向量来计算它们。
screenTranslation是像素坐标的半屏移位,以考虑到屏幕原点不在屏幕中心,而是在左上角;translationToCenter 表示将地图点移动到屏幕中心的平移;screenScaling 表示从地图单位到像素的转换因子。我们在构造函数中分配所有这些对象并存储对它们的引用,这样我们就可以避免在每一帧重新创建它们。其中一些在某些元素中具有固定值,我们可以通过在构造函数中预先分配它们的值来利用这一事实;在动画的每一帧中,我们只更新变化的元素。
构造函数还需要开始监听 layer.graphics 集合的变化;每次检测到更改时,needsUpdate 标志设置为 true 并请求新的渲染。
1
2
3
4
5
6
7
8
this .needsUpdate = false ;
const requestUpdate = function ( ) {
this .needsUpdate = true ;
this .requestRender();
}.bind( this );
watchUtils.on( this , "layer.graphics" , "change" , requestUpdate, requestUpdate, requestUpdate);
attach()attach() 覆盖在很大程度上仍然是一个构造函数,但它可以通过 this.context 成员访问 WebGL 上下文。当调用 attach() 时,WebGL 上下文保证处于默认状态。
1
const gl = this .context;
我们首先内联一些 GLSL 源代码;它们将用于创建顶点着色器和片段着色器对象。顶点着色器执行以下操作:
获取以地图单位表示的 a_position 属性,并使用 u_transform 矩阵将其转换为像素; 添加偏移量(以像素为单位); 最后使用 u_display 矩阵将位置转换为裁剪空间。 偏移量也作为可变变量输出,因为它是片段着色器中的纹理所必需的。偏移量是通过将 a_offset 属性乘以 70.0 获得的。a_offset 属性的确切性质和含义以及它与 a_position 的关系将在后面讨论;顶点变换公式的效果是产生一个以原始位置为中心的 70x70 标记。
1
2
3
4
5
6
7
8
9
10
11
12
13
const vertexSource = `
precision mediump float;
uniform mat3 u_transform;
uniform mat3 u_display;
attribute vec2 a_position;
attribute vec2 a_offset;
varying vec2 v_offset;
const float SIZE = 70.0;
void main(void) {
gl_Position.xy = (u_display * (u_transform * vec3(a_position, 1.0) + vec3(a_offset * SIZE, 0.0))).xy;
gl_Position.zw = vec2(0.0, 1.0);
v_offset = a_offset;
}` ;
片段着色器使用 v_offset 插值的长度作为基于余弦的定律的输入,该定律围绕中心径向调制标记的透明度。请注意我们如何输出预乘颜色值。
1
2
3
4
5
6
7
8
9
10
11
12
13
const fragmentSource = `
precision mediump float;
uniform float u_current_time;
varying vec2 v_offset;
const float PI = 3.14159;
const float N_RINGS = 3.0;
const vec3 COLOR = vec3(0.23, 0.43, 0.70);
const float FREQ = 1.0;
void main(void) {
float l = length(v_offset);
float intensity = clamp(cos(l * PI), 0.0, 1.0) * clamp(cos(2.0 * PI * (l * 2.0 * N_RINGS - FREQ * u_current_time)), 0.0, 1.0);
gl_FragColor = vec4(COLOR * intensity, intensity);
}` ;
编译和链接着色器后,可以检索和存储统一位置以供以后使用。
1
2
3
this .uTransform = gl.getUniformLocation( this .program, "u_transform" );
this .uDisplay = gl.getUniformLocation( this .program, "u_display" );
this .uCurrentTime = gl.getUniformLocation( this .program, "u_current_time" );
我们还创建了顶点和索引缓冲区,它们在开始时是空的。indexBufferSize 属性将跟踪索引缓冲区中的索引数量。
1
2
3
this .vertexBuffer = gl.createBuffer();
this .indexBuffer = gl.createBuffer();
this .indexBufferSize = 0 ;
最后,我们将视图的当前中心保存在一个名为 centerAtLastUpdate 的属性中;我们将看到这个向量将如何在提高顶点着色器的地理准确性方面发挥重要作用。
1
this .centerAtLastUpdate = vec2.fromValues( this .view.state.center[ 0 ], this .view.state.center[ 1 ]);
detach()该函数充当析构函数;当图层从地图中移除并且必须销毁相应的图层视图时调用它。attach() 覆盖必须停止监视 graphics 集合并释放创建的 WebGL 对象。与 attach() 一样,当 detach() 被调用时,WebGL 状态也保证为默认状态。
1
2
3
4
5
6
7
this .watcher.remove();
const gl = this .context;
gl.deleteBuffer( this .vertexBuffer);
gl.deleteBuffer( this .indexBuffer);
gl.deleteProgram( this .program);
render()render() 覆盖可以通过作为参数接收的 renderParameters 对象访问 WebGL 上下文和视图状态。
1
2
const gl = renderParameters.context;
const state = renderParameters.state;
要记住的非常重要的一点是,每次调用 render() 时,API 都会将 WebGL 重置为几乎 默认的初始状态;您每次都必须从头开始重新配置它 。此外,不要从事件处理程序、承诺回调和超时/间隔函数发出 WebGL 调用 ;它不仅效率低下,而且您也无法保证 WebGL 状态将是您在执行时所期望的状态 。在大多数情况下,它不会,您甚至可能最终破坏其他层的渲染 。
在此初始状态下可能是非默认的仅有的两个设置是:
render() 的主体不得 更改这些设置
render() 做的第一件事是评估我们是否需要更新顶点和索引缓冲区的内容,如果需要,就这样做;有两种不同的条件会触发此事件,我们将在下一节中详细讨论它们。目前,我们将决策和更新逻辑本身分解为一个辅助函数。
1
this .updatePositions(renderParameters);
如果上面的调用确定没有要渲染的内容,则可能会清空缓冲区。在这种情况下,render() 方法的工作已经完成,我们可以简单地返回。
1
2
3
if ( this .indexBufferSize === 0 ) {
return ;
}
现在我们需要构建将作为制服传递给着色器的变换矩阵。 我们将使用 glMatrix 来简化这个过程。请记住,glMatrix 约定使得各种转换在代码中出现的顺序是相反的,因为矩阵是右乘的。另外,请注意我们如何在大多数计算中包含 devicePixelRatio ; 这对于转换在不同的屏幕类型和浏览器设置中正常工作至关重要。
我们首先计算 transform 矩阵。下面的代码指定执行以下操作的转换:
将本地原点移动到地图中心; 按分辨率缩放,以便将地图单位(米)转换为像素; 根据地图的旋转围绕屏幕中心旋转; 转换为屏幕大小的一半以说明屏幕的原点不在中心,而是在左上角。
1
2
3
4
5
6
7
8
9
mat3.identity( this .transform);
this .screenTranslation[ 0 ] = (devicePixelRatio * state.size[ 0 ]) / 2 ;
this .screenTranslation[ 1 ] = (devicePixelRatio * state.size[ 1 ]) / 2 ;
mat3.translate( this .transform, this .transform, this .screenTranslation);
mat3.rotate( this .transform, this .transform, ( Math .PI * state.rotation) / 180 );
this .screenScaling[ 0 ] = devicePixelRatio / view.state.resolution;
this .screenScaling[ 1 ] = -devicePixelRatio / view.state.resolution;
mat3.scale( this .transform, this .transform, this .screenScaling);
mat3.translate( this .transform, this .transform, this .translationToCenter);
连同在构造函数中预先指定的值(参见 “构造函数” 部分),上面的代码片段完全指定了 transform 矩阵,除了一个我们还没有讨论过的组件:translationToCenter 向量;暂时您可以假设它被定义如下。
1
2
this .translationToCenter[ 0 ] = -state.center[ 0 ];
this .translationToCenter[ 1 ] = -state.center[ 1 ];
假设 a_position 属性位置是视图空间参考中的普通 (x, y) 坐标对,上述内容似乎可以正常工作。然而,事情只会在小范围内起作用。放大会发现由于所涉及的值很大,会导致一些精度问题;标记位置在大范围内会显得不稳定。我们将在下一节中看到如何解决这个问题。
display 矩阵必须从像素坐标转换为剪辑坐标,并且我们已经静态分配了它的大部分元素;我们只需要设置两个比例因子,使它们与(可能更改的)屏幕参数相匹配。
1
2
this .display[ 0 ] = 2 / (devicePixelRatio * state.size[ 0 ]);
this .display[ 4 ] = - 2 / (devicePixelRatio * state.size[ 1 ]);
至此,我们拥有了需要渲染的一切;我们绑定程序、上传 uniforms、设置属性指针、绑定索引缓冲区并配置预乘 alpha 混合。请注意我们如何以秒为单位将当前时间戳 performance.now() / 1000.0 传递给着色器程序。
1
2
3
4
5
6
7
8
9
10
11
12
13
gl.useProgram( this .program);
gl.uniformMatrix3fv( this .uTransform, false , this .transform);
gl.uniformMatrix3fv( this .uDisplay, false , this .display);
gl.uniform1f( this .uCurrentTime, performance.now() / 1000.0 );
gl.bindBuffer(gl.ARRAY_BUFFER, this .vertexBuffer);
gl.bindBuffer(gl.ELEMENT_ARRAY_BUFFER, this .indexBuffer);
gl.enableVertexAttribArray( this .aPosition);
gl.enableVertexAttribArray( this .aOffset);
gl.vertexAttribPointer( this .aPosition, 2 , gl.FLOAT, false , 16 , 0 );
gl.vertexAttribPointer( this .aOffset, 2 , gl.FLOAT, false , 16 , 8 );
gl.enable(gl.BLEND);
gl.blendFunc(gl.ONE, gl.ONE_MINUS_SRC_ALPHA);
gl.drawElements(gl.TRIANGLES, this .indexBufferSize, gl.UNSIGNED_SHORT, 0 );
最后,由于我们希望图层具有动画效果,因此我们立即请求另一个帧。
updatePositions() 方法负责更新屏幕上顶点的位置。它还负责实现解决上述精度问题的逻辑。它首先检索它需要的一些参数。
1
2
3
const gl = renderParameters.context;
const stationary = renderParameters.stationary;
const state = renderParameters.state;
如果视图不是静止的,即 用户正在平移、旋转或缩放地图,那么我们计算 translationToCenter 属性作为 centerAtLastUpdate 和 state.center之间的差异;请注意与我们为相同变量提供的上一个公式的区别(参见 “覆盖 render()” 部分),其中没有 centerAtLastUpdate 项并且 translationToCenter 与 state.center 正好相反。
1
2
3
4
5
6
if (!stationary) {
this .translationToCenter[ 0 ] = this .centerAtLastUpdate[ 0 ] - state.center[ 0 ];
this .translationToCenter[ 1 ] = this .centerAtLastUpdate[ 1 ] - state.center[ 1 ];
this .requestRender();
return ;
}
上面公式的优点是它会产生一个平移分量小得多的transform矩阵;这反过来将使我们能够在顶点缓冲区中编码较小的坐标,从而限制精度误差的影响,当使用浮点数时,精度误差与幅度成正比。这将解决大规模位置的不稳定性。
接下来,我们检查是否需要更新顶点位置;如果 graphics 集合没有改变,并且视图仍然在上次更新发生的位置居中,则不需要任何操作,我们可以返回。
1
2
3
if (! this .needsUpdate && this .translationToCenter[ 0 ] === 0 && this .translationToCenter[ 1 ] === 0 ) {
return ;
}
否则,我们必须更新缓冲区。此时我们可以重置 needsUpdate 标志并将当前中心记录在 centerAtLastUpdate 变量中。
1
2
3
4
this .centerAtLastUpdate.set(state.center);
this .translationToCenter[ 0 ] = 0 ;
this .translationToCenter[ 1 ] = 0 ;
this .needsUpdate = false ;
更新逻辑中的守卫使得底层数据的变化,以及视点的变化,将导致缓冲区数据的重新生成,但是这种更新过程会延迟到视图变得静止。通过这种方式,我们避免了在用户仍在平移时对 GPU 视频内存的持续写入访问;另外,请注意,简单地旋转和放大和缩小不会改变中心,因此不会导致缓冲区数据的更新。
如果控制流做到了这一点,我们必须生成实际的缓冲区数据。我们将为每个标记输出一个四边形;每个四边形有 4 个顶点,具有 2 个大小为 2 的属性;a_position 以地图单位和 a_offset 表示。请注意我们不编码点的绝对位置,但它相对于 this.centerAtLastUpdate 的位置要小得多。另请注意,每个顶点的 a_position; 值都相同。通过 a_offset 属性中的值,我们将每个顶点置换为四边形的角之一。对于 a_offset 属性,我们使用 -0.5 表示左/上,+0.5 表示右/下;当乘以顶点着色器中的常量 70.0 时(参见 "Overriding attach()" 部分),结果是一个70x70 像素标记的正方形 。
1
2
3
4
5
6
7
8
9
10
11
12
13
14
15
16
17
18
19
20
21
22
23
24
25
26
27
28
29
30
31
32
33
34
const graphics = this .layer.graphics;
gl.bindBuffer(gl.ARRAY_BUFFER, this .vertexBuffer);
const vertexData = new Float32Array ( 16 * graphics.length);
let i = 0 ;
graphics.forEach(
( graphic ) => {
const point = graphic.geometry;
// The (x, y) position is relative to the encoded center.
const x = point.x - this .centerAtLastUpdate[ 0 ];
const y = point.y - this .centerAtLastUpdate[ 1 ];
vertexData[i * 16 + 0 ] = x;
vertexData[i * 16 + 1 ] = y;
vertexData[i * 16 + 2 ] = - 0.5 ;
vertexData[i * 16 + 3 ] = - 0.5 ;
vertexData[i * 16 + 4 ] = x;
vertexData[i * 16 + 5 ] = y;
vertexData[i * 16 + 6 ] = 0.5 ;
vertexData[i * 16 + 7 ] = - 0.5 ;
vertexData[i * 16 + 8 ] = x;
vertexData[i * 16 + 9 ] = y;
vertexData[i * 16 + 10 ] = - 0.5 ;
vertexData[i * 16 + 11 ] = 0.5 ;
vertexData[i * 16 + 12 ] = x;
vertexData[i * 16 + 13 ] = y;
vertexData[i * 16 + 14 ] = 0.5 ;
vertexData[i * 16 + 15 ] = 0.5 ;
++i;
}.bind( this )
);
对于索引缓冲区,我们为每个四边形生成六个索引:0-1-2 、1-3-2 ,它们使用两个共享斜边,它们一起形成四边形。
1
2
3
4
5
6
7
8
9
10
11
gl.bindBuffer(gl.ELEMENT_ARRAY_BUFFER, this .indexBuffer);
const indexData = new Uint16Array ( 6 * graphics.length);
for ( let i = 0 ; i < graphics.length; ++i) {
indexData[i * 6 + 0 ] = i * 4 + 0 ;
indexData[i * 6 + 1 ] = i * 4 + 1 ;
indexData[i * 6 + 2 ] = i * 4 + 2 ;
indexData[i * 6 + 3 ] = i * 4 + 1 ;
indexData[i * 6 + 4 ] = i * 4 + 3 ;
indexData[i * 6 + 5 ] = i * 4 + 2 ;
}
最后,使用 gl.bufferData 调用将准备好的数据上传到 GPU。索引的数量记录在属性 indexBufferSize 中,以便在调用 gl.drawElements 时我们知道要绘制多少个元素。
hitTest()我们实现的自定义图层视图是底层地理数据集 layer.graphics 集合的可视化表示。用户通常期望能够与此类地理信息进行交互。这可以通过实现 hitTest() 方法来实现,以返回给定屏幕点 (x, y) 下的图形。
如果图层上没有图形,我们什么也不返回。
1
2
3
4
5
6
7
// The map view.
const view = this .view;
if ( this .layer.graphics.length === 0 ) {
// Nothing to do.
return promiseUtils.resolve([]);
}
否则,我们会在屏幕空间中找到最近的图形。
1
2
3
4
5
6
7
8
9
10
11
12
13
14
const distances = this .layer.graphics.map( ( graphic ) => {
const graphicPoint = view.toScreen(graphic.geometry);
return Math .sqrt((graphicPoint.x - x) * (graphicPoint.x - x) + (graphicPoint.y - y) * (graphicPoint.y - y));
});
let minIndex = 0 ;
distances.forEach( ( distance, i ) => {
if (distance < distances.getItemAt(minIndex)) {
minIndex = i;
}
});
const minDistance = distances.getItemAt(minIndex);
由于所有标记都是直径为 70 像素的圆圈,因此可以肯定地说,如果最小距离超过 35 像素,则没有命中任何内容。
1
2
3
if (minDistance > 35 ) {
return promiseUtils.resolve([]);
}
否则就是命中;我们将该层设置为图形的源层(弹出视图工作所必需的),我们返回一个解析到图形的承诺。
1
2
3
const graphic = this .layer.graphics.getItemAt(minIndex);
graphic.sourceLayer = this .layer;
return promiseUtils.resolve([graphic]);
请注意,在现实世界的自定义可视化中,标记可能不是圆形的,它们的大小和位置可能取决于 SimpleMarkerSymbol 的属性 ;命中测试逻辑需要考虑它,以便交互体验与用户在屏幕上看到的内容相匹配。